
How to Prepare Your Home for Photos When You’re Still Living In It (Without Losing Your Mind)
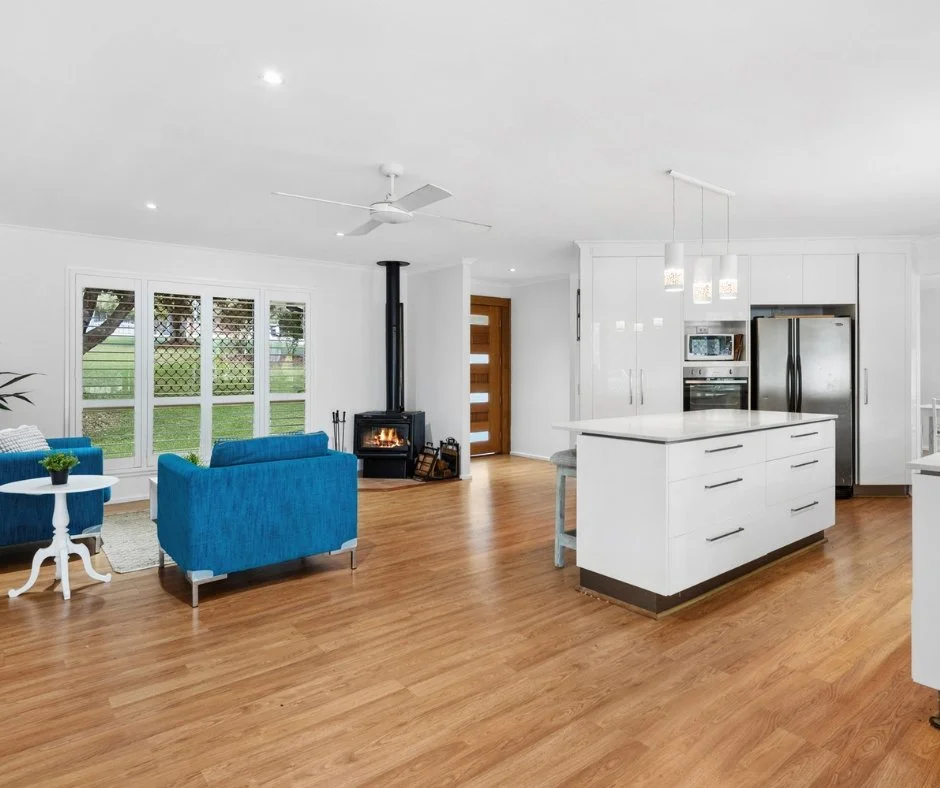
This home was transformed from ‘lived-in’, to ‘market-ready’. Furniture was swapped around and key pieces and decor were added for the final look.
If you’ve ever tried to prepare your lived-in home for real estate photos, you’ll understand this feeling:
You tidy the kitchen… someone makes a sandwich.
You clean the bathroom… someone showers.
You fluff the cushions… the dog sits on them.
It feels like the home is actively fighting against you.
If you’re nodding, I want you to know something:
You are not alone, and you are not doing anything wrong.
Lived-in homes are real homes. They’re full of life, schedules, pets, school bags, washing, mail, food and people. Preparing for photos isn’t easy — but it IS doable.
After working with more than 900 families across the Moreton Bay Region, I’ve created a simple, calm, real-world process to prepare your home for photos without feeling like you need to stop living in it.
Let’s walk through that process together.
1. Start with the spaces buyers see FIRST
There’s a science to this.
Buyers — and photographers — form their emotional impression of your home within seconds.
The areas that impact photos the most are:
entrance
living room
kitchen
main bedroom
outdoor area
These also tend to be the “clutter hotspots” in lived-in homes.
Here’s the good news: these spaces don’t need to be perfect — they just need to feel:
✔ clean
✔ spacious
✔ intentional
I call this the “calm corners principle.”
If even part of the photo communicates calm and care, your whole home feels elevated.
2. Pack away 20%, not everything
Please don’t fall into the “everything must disappear” trap.
You’re still living in your home. You still need:
your kettle
your toiletries
your kids’ morning routine items
your pet bowls
your shoes
We’re aiming for functional tidy, not fantasy.
Here’s what to remove temporarily:
visual clutter (piles, stacks, paperwork)
excess small décor
fridge magnets
bulky appliances
washing baskets
items stored on top of wardrobes
Here’s what can stay:
lamps
1–2 decorative pieces per surface
plants
throws and cushions
everyday essentials tucked neatly
Think: a lived-in home that feels curated, not chaotic.
3. Edit furniture for flow
You don’t need new furniture — you just need the right arrangement.
Lived-in homes often feel smaller in photos because of:
big sofas
extra chairs
pet beds
side tables
toy baskets
“nice to have” pieces you don’t even notice anymore
For photo day, consider removing 1–2 pieces per room.
This instantly:
✔ widens the photo
✔ improves light flow
✔ reduces visual noise
✔ makes your home feel bigger
I do this in nearly every consultation, and the transformation is immediate.
4. Light is EVERYTHING
Photographers can work magic, but natural light will always win.
Before photo day:
open every blind
raise every curtain
clean window tracks
check every light bulb (matching colour temperature!)
remove heavy décor blocking windows
You want light to travel through the room cleanly.
Great light = great photos = more clicks online = more buyers through your door.
5. Master the “20-minute tidy”
This is my signature system and clients LOVE it.
Here’s what to do the hour before photos:
Kitchen
clear benches
wipe surfaces
put tea towels away
hide rubbish bins
Bathroom
clear toiletries
hang fresh towels
tuck away brushes, razors, bottles
remove bathmats
Bedrooms
smooth the linen
plump pillows
hide clothes
clear bedside tables
Living areas
fluff cushions properly (vertical karate chop optional 😉)
fold throws
tidy cords
hide remotes
Outdoors
sweep paths
hide hoses
tuck away pool toys
This isn’t about perfection. It’s about eliminating distractions, so the photo captures the feel of the space.
6. Your home doesn’t need to look like a display home — just well-loved and well-prepared
This is where people breathe a sigh of relief.
Your lived-in home is allowed to look like:
children live there
pets live there
YOU live there
We’re not trying to trick anyone. We’re simply helping buyers see the potential and space, not the noise of everyday life.
Presentation is about respect — for yourself, your home, and the buyer’s eye.
7. If in doubt, ask for help (even one room at a time)
Sometimes what stops sellers isn’t the work — it’s the overwhelm.
You don’t need to overhaul your whole house to get great photos.
You just need clarity, strategy and a fresh perspective.
I can help you create a room-by-room plan using what you already own.
You’d be surprised how quickly small, intentional edits can elevate your online presence — and that matters, because buyers are deciding whether to attend your open home based on those photos.
Final thoughts
Preparing a lived-in home for real estate photos doesn’t need to be stressful, expensive or unrealistic.
With a bit of planning and a clear process, you can create photos that feel calm, bright and welcoming — all while still living your normal life.
If you’d like help with one room or your whole home, just reach out.
I’m here to make the process easier.